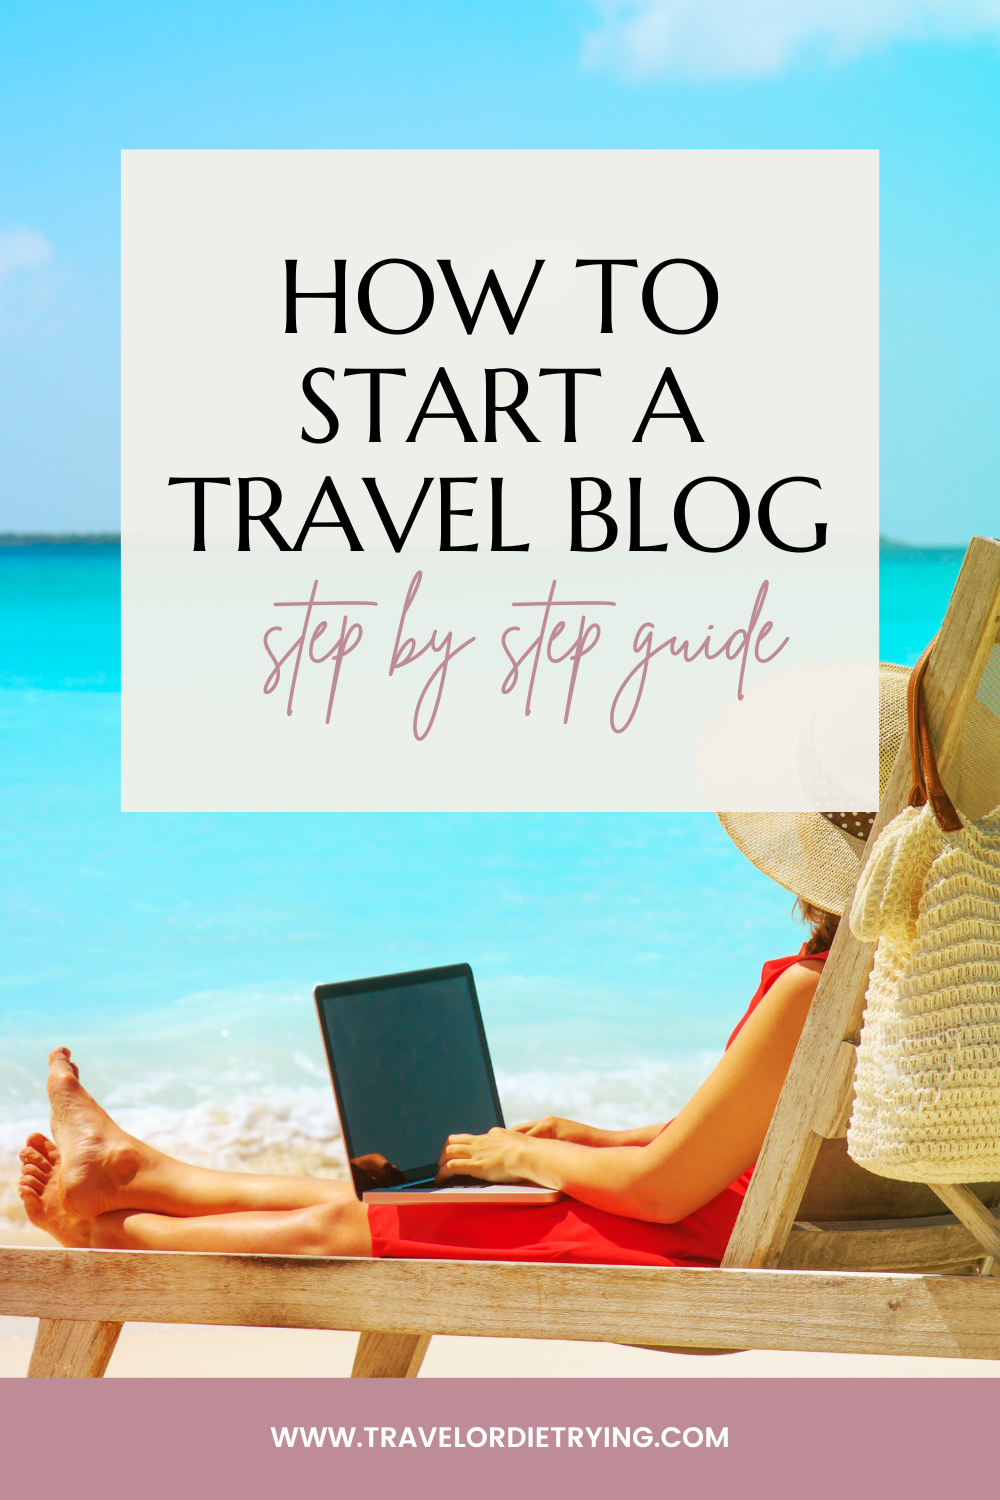
In today’s digital nomads and wanderlust world, travel blogging has become a popular way to share experiences, inspire others, and earn an income.
If you’re passionate about travel and want to turn your adventures into captivating stories that resonate with readers worldwide, this step-by-step guide will help you start building a successful travel blog in about 20 minutes and for less than $60 in total. It’ll be straightforward, relatively easy, and easy to understand (without stupid and strange jargon).
Related post: How To Travel Cheap: Top 10 Tips And Hacks For Budget Travelers
I earn a small commission when you book through these links, which help run this blog.
Why should you create a travel blog?
Before we dive in, though, let’s talk about WHY you should build a blog:
- Travel blogging has quickly become one of the most popular ways of communicating and spreading information.
- It’s a great way to express yourself and also a fantastic way to share your travel experience with others.
- You become a better person and a better writer.
- The best reason? You can travel the world and make money doing it!
Can anyone really start a travel blog?
Starting a travel blog is surprisingly straightforward and accessible for most people. You don’t need extensive technology, coding, or design knowledge to get started. All you really need is to sign up with a hosting provider and cover the monthly fees.
So essentially, if you have a credit/debit card and can spare $60 a year or so, you can start a travel blog.
Maybe I’m too late to start a travel blog?
Don’t worry about the competition; you can succeed if you take it seriously. Simple as that. Travel blogging and blogging, in general, is one of the best ‘jobs’ in the world, and it’s worth all the effort!
With that in mind, let’s move on to how to start a travel blog, step by step. If you follow this, you’ll have a blog in less than 20 minutes.
If you want to blog as a hobby, you can always start a simple travel blog for family & friends on WordPress.com. It’s free! However, if you want to make a living with travel blogging, keep reading.
STEP 1: Pick A Good Travel Blog Name
The first thing you need to do is pick a domain name (i.e your website name). When picking your domain name, there are no hard and fast rules on what to pick. There’s no such thing as a “wrong domain,” but there are a couple of things you should know to help you pick the best domain:
Make A Name That Can Last
Don’t call your blog “Travel For a Year” if your trip has the potential to last longer; don’t call yourself 21yearoldtraveler.com for the same reason. What happens when you turn 30? Branding yourself correctly is pretty important in the business of travel blogging.
Make sure you pick a name that isn’t so focused that if you decide to shift gears or change your focus, you can keep the same domain name.
Make It Short and Memorable
Use 3-4 words maximum. Your travel blog domain name should be relatively short, easy to type, easy to spell, easy to remember, and easy to share. Brainstorm by writing down many words you think will best describe your blog.
Adventure? Food? Culture? Asia? Traveling Tips? South America? What do you want to write about? Who are you? What is your passion? Write everything down and start playing with different combinations of words. Select a name that reflects your travel niche and captures the imagination. Try to avoid words like “nomad,” “vagabond,” “wanderlust,” and “adventure.” They have been done to death.
Be Professional
When it comes to working with big brands, luxury hotels, and creating products – these businesses don’t want to be aligned with dubious bloggers, so anything referencing drugs, getting drunk, or having sex might seem cool now, but when Nikon or the Four Seasons refuse to work with you two years later because of your branding, you will wish you choose something more professional. Think ahead.
Be Careful
Make sure the .com domain name is available. It may not seem that important, but people are so used to websites ending with .com that they’ll likely forget any other domain extension.
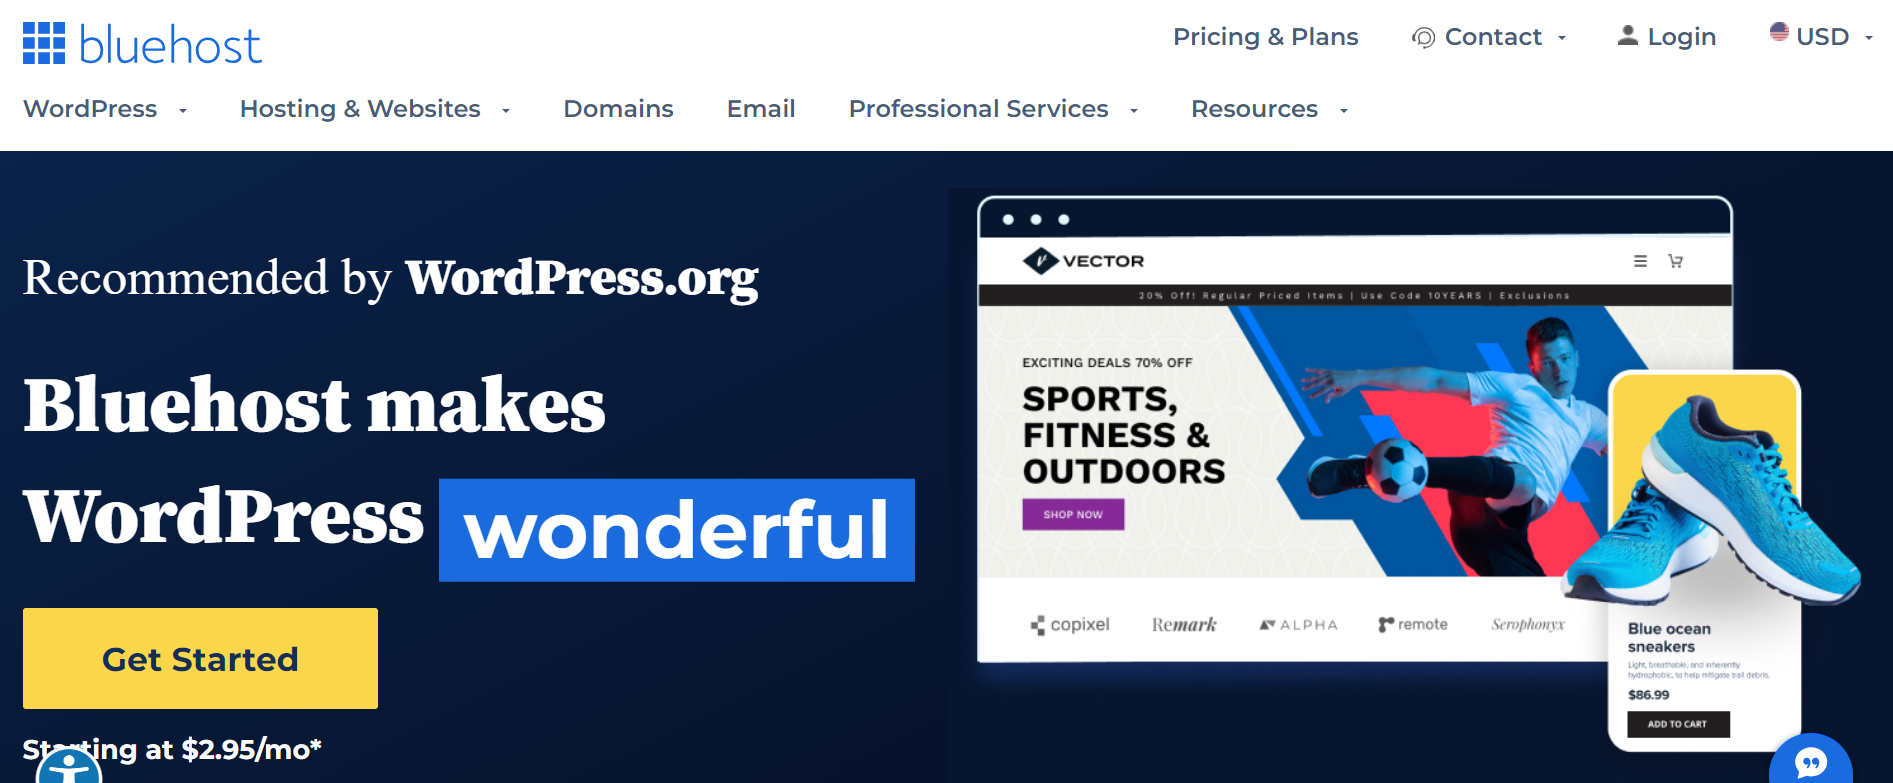
STEP 2: Choose Hosting For Your Blog

After you’ve picked out your domain name, you’ll need to register it and buy hosting. What is hosting? It’s not as confusing as it sounds. Most websites need to “rent” space on the internet. A place to store all your blog’s data, files, and photos so that people worldwide can easily access it when they type in your domain name.
Hosting can be pretty cheap. New travel blogs are strongly advised to be hosted with BlueHost for optimal results. Their rates are cheap at between $2.95 and $5.95 per month. They also offer a 30-day money-back guarantee, and their live chat support team is helpful and can usually fix issues within minutes.
Setting it up should take you less than ten minutes.
Head to the Blue Host home page and start your travel blog today. This is what you see….
[powerkit_button size=”md” style=”success” block=”false” title=”→ Click here to Claim this Exclusive Bluehost offer ←” url=”https://www.bluehost.com/track/travelordietrying/” target=”_blank” nofollow=”false”]
Part 1 – Click on the big button that says “Get Started”
Part 2 – Pick a plan:
Now you have to choose which hosting plan you want. As you’re just starting out, choose the cheapest plan for $2.95 per month. At this point, you don’t know what will happen with your site down the road, and you can always upgrade at any point when your site starts to take off. Hit select the starter plan.
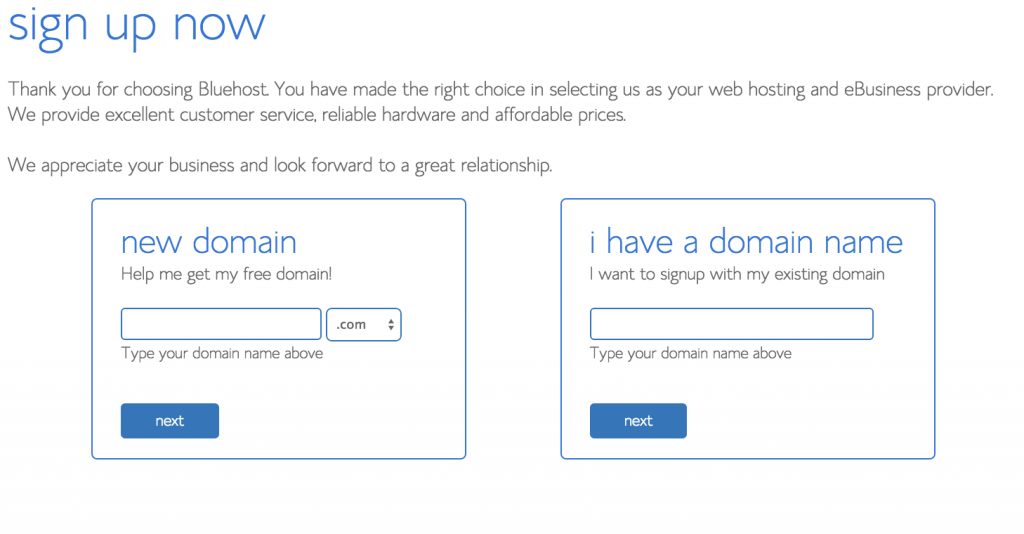
Part 3 – Buying your blog name (Domain Name)
This is where you can check the availability of your blog name and then go on and purchase it. Type the name of the blog you want to buy in the box on the left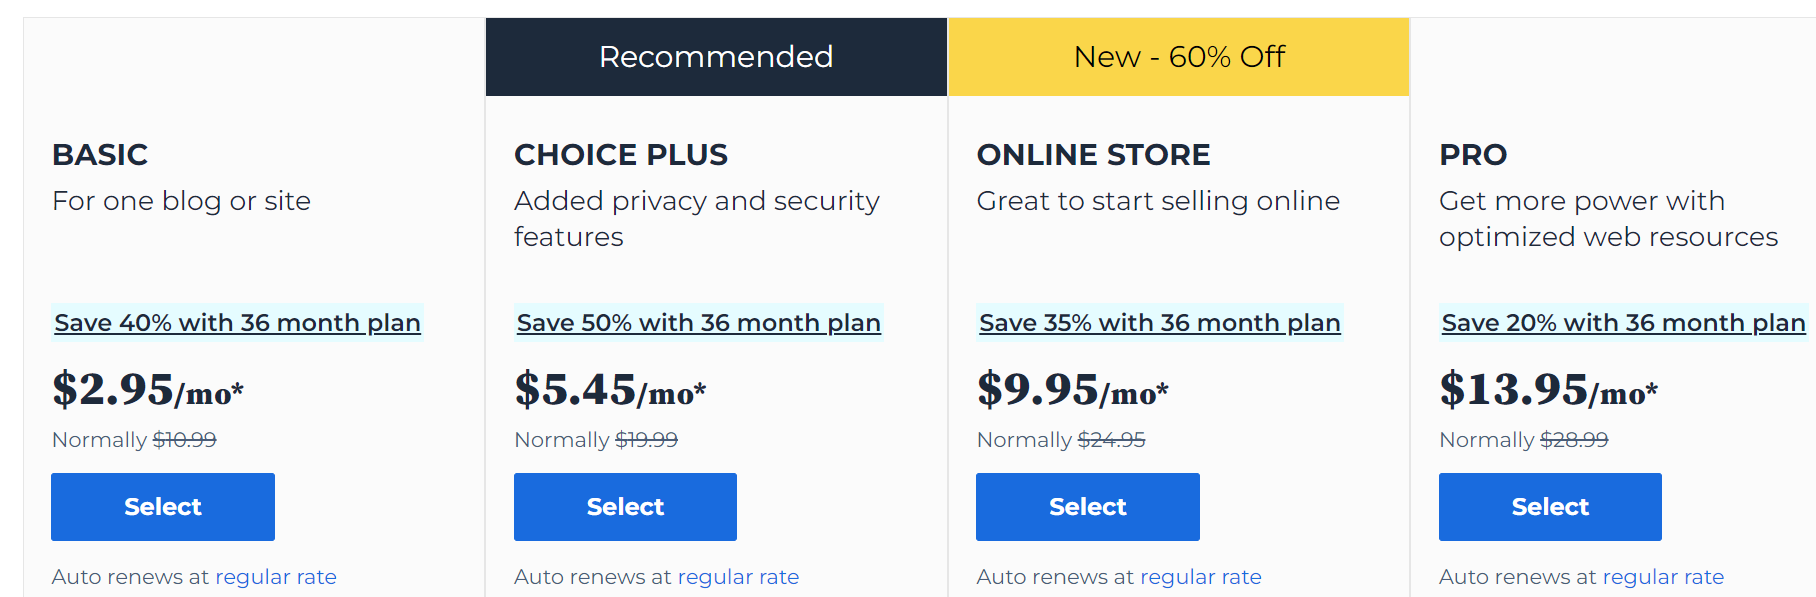 and click ‘next.’ If someone else has already snapped it up, don’t panic. Think of some alternative blog names and find the right one for you. When you find your perfect available domain, click ‘next.’
Tip: Check the name multiple times for spelling errors!
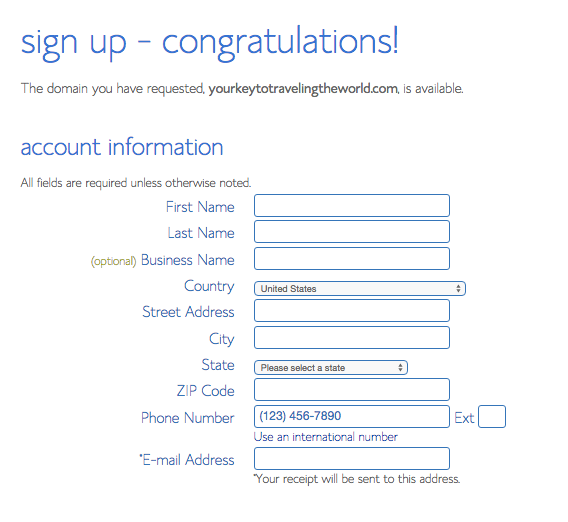
 Part 4 – Fill in your details
On the next screen, fill in your name and address.
You can now sign up for your hosting for 1-3 years, with the prices varying between $2.95 and $5.95 per month. If you’re a first-time blogger, the 1-year option is best.
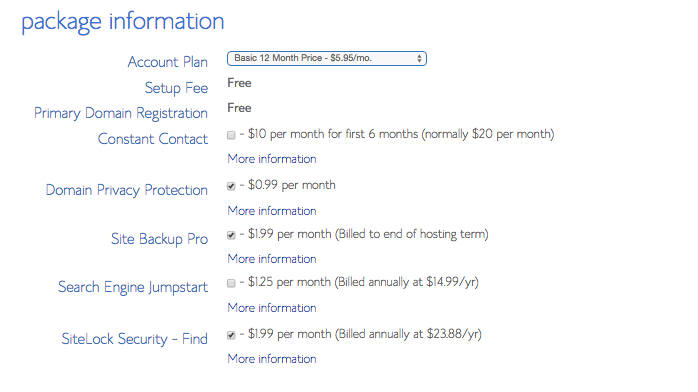
All the extra stuff you can add on? Remove it all. The only one you may choose to keep is domain privacy so no one can find out who owns your blog. It may not seem like a big deal now, but once you build a sizeable audience and attract the superfans and haters, you’ll want to keep your details a secret.
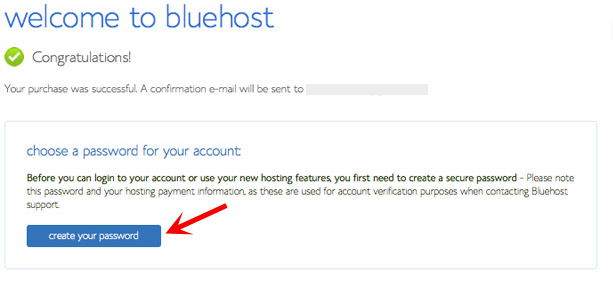
Part 5 – Creating your BlueHost password
After you complete the filling your details stage, you’ll be greeted by this screen. Click on ‘create your password. Then another screen appears. Go ahead and create your password.
 STEP 3. Install Free WordPress Software

After registering your domain name and getting your hosting package, you next want to install WordPress on your Bluehost control panel. It is super easy.
WordPress is FREE software that allows you to publish articles, add advertising, change your design, etc. It’s all super user-friendly. There are other platforms, but WordPress is the king of blogging and probably always will be.
Here are some useful screenshots:
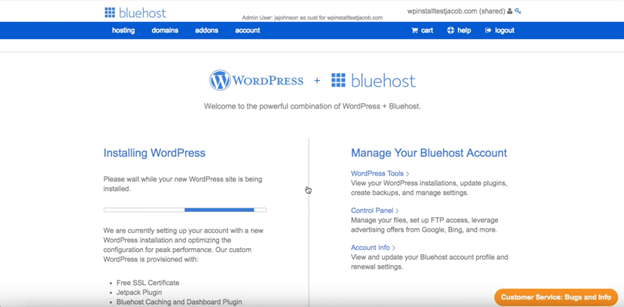
Part 1 – BlueHost has implemented a new feature that automatically installs WordPress when registering for hosting.
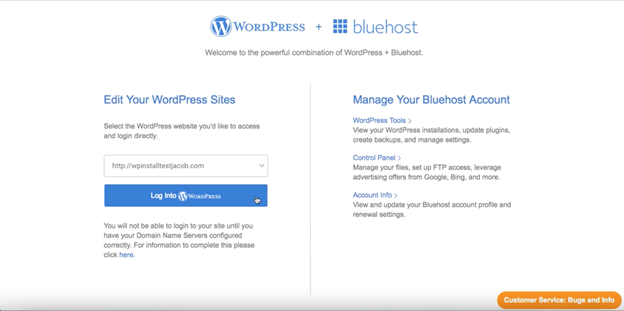
Part 2- After WordPress is installed, input your domain name in the Edit Your WordPress Sites section
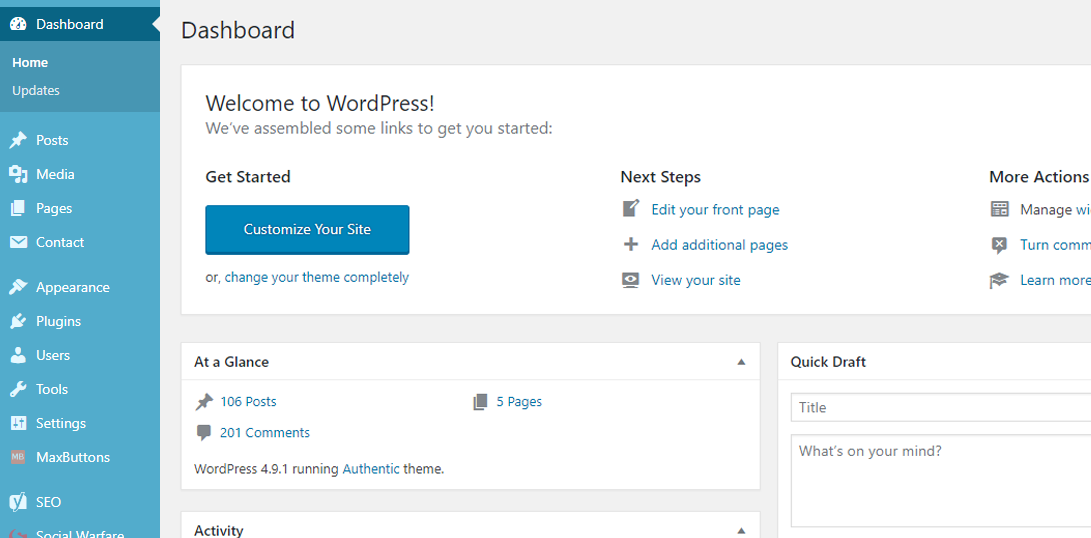
Part 3 – Once you input your username and password, you will be sent directly to your new blog’s dashboard on WordPress.
That screen you now see is your WordPress dashboard, where you’ll be running your business. It is the control center, where you can edit everything, publish blog posts, etc. Only you can access this, not your readers.
 Your blog is now live. Welcome to the club! You now have a travel blog. That wasn’t too hard. But wait, there’s more!
STEP 4. Learn How To Use WordPress
 Feeling intimidated about WordPress? Don’t worry. Because WordPress is the industry standard for blogging platforms and has been for years, there are a lot of helpful tutorials online that will teach you anything you need to know.
Spend a weekend learning how to use your dashboard, tweak your site’s settings, post an article, etc. You’ll get the hang of everything with practice.
Step 5. Get A Professional Blog Theme
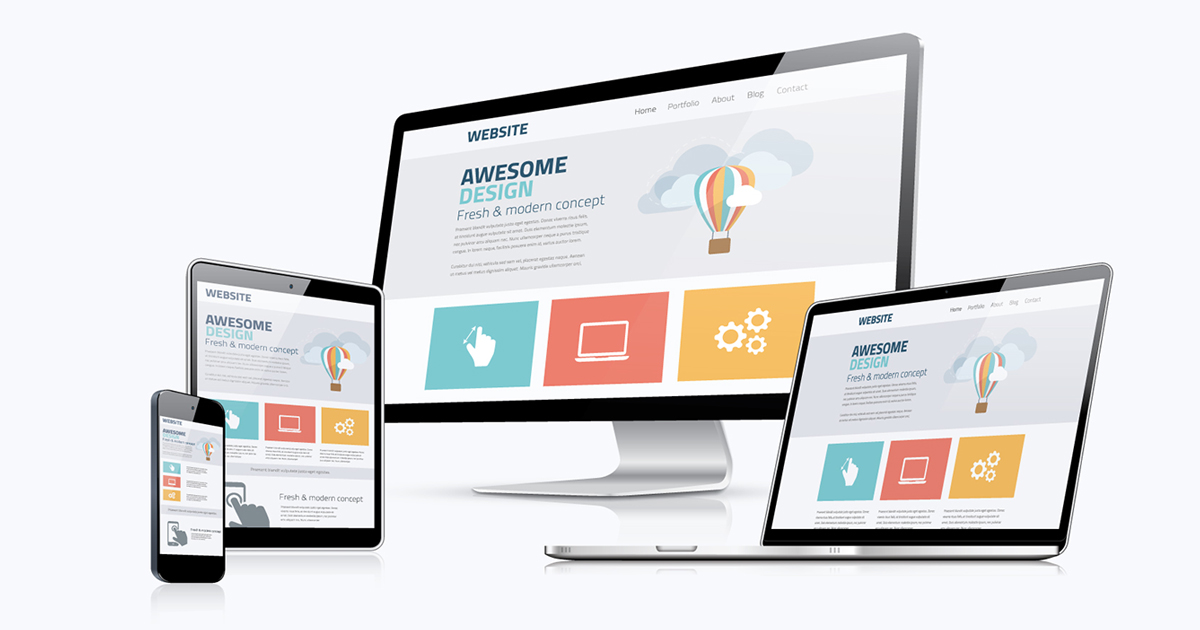 It’s time to make your site pretty! A good design is one of the most important things a blog needs besides good content. Now you need to install a design (referred to in WordPress as a ‘theme’) for your new blog. You’ve sorted out your hosting through BlueHost, and now you have to renovate your site by adding a theme on WordPress.
Part 1- Now go to: www.yournewtravelblog.com /wp-admin…
Use your username and password and sign in to the backend of your new website…
Part 2 – Once you logged into the dashboard of WordPress, go to the sidebar on the left-hand side, find ‘Appearance,’ hover over it, and click ‘Themes’ when it pops up
 You can choose hundreds of free themes, so choose the one you like the look of and click activate. Don’t worry; none of this is permanent so you can try a few out.
NOTE: The free themes aren’t super cool, and while this is ok for playing around in the beginning, if you want to take this seriously and eventually make money with your travel blog, you should buy a premium design. Professional blog themes cost between $25-$80, and they’ll greatly improve the look and functionality of your site.
Step 6. Getting a Header
![]() A logo/banner is what you’ll use to differentiate yourself from other bloggers, so it’s a big deal. The creative logo makes your site and brand stand out from the thousands of other travel blogs online. During the initial stages of your blog, it is not necessary to invest a significant amount of time or money into it.
A logo/banner is what you’ll use to differentiate yourself from other bloggers, so it’s a big deal. The creative logo makes your site and brand stand out from the thousands of other travel blogs online. During the initial stages of your blog, it is not necessary to invest a significant amount of time or money into it.
Here are some recommendations:
[powerkit_tabs type=”tabs” nav=”horizontal”]
[powerkit_tab title=”Canva”]
Canva is completely free to use, so if you’re starting your travel blog with a tight budget, this is a great option. Once you’ve created an account and signed in, click on Create a design and play around with any of the banner-sized options.
[/powerkit_tab]
[powerkit_tab title=”Fiverr”]
If you’re not comfortable with your own design skills, I recommend heading to Fiverr and checking out what’s on offer. You’ll be able to browse reviews and examples of each designer’s work on the site to ensure you receive a decent-looking end result.
[/powerkit_tab]
[powerkit_tab title=”99 Designs”]
Alternatively, you can set up a competition on 99 designs, where graphic designers submit designs based on your brief, and you can choose the one you like best. This is a more expensive option but typically results in a more professional-looking logo.
[/powerkit_tab]
[/powerkit_tabs]
Step 7. Install Your Plugins
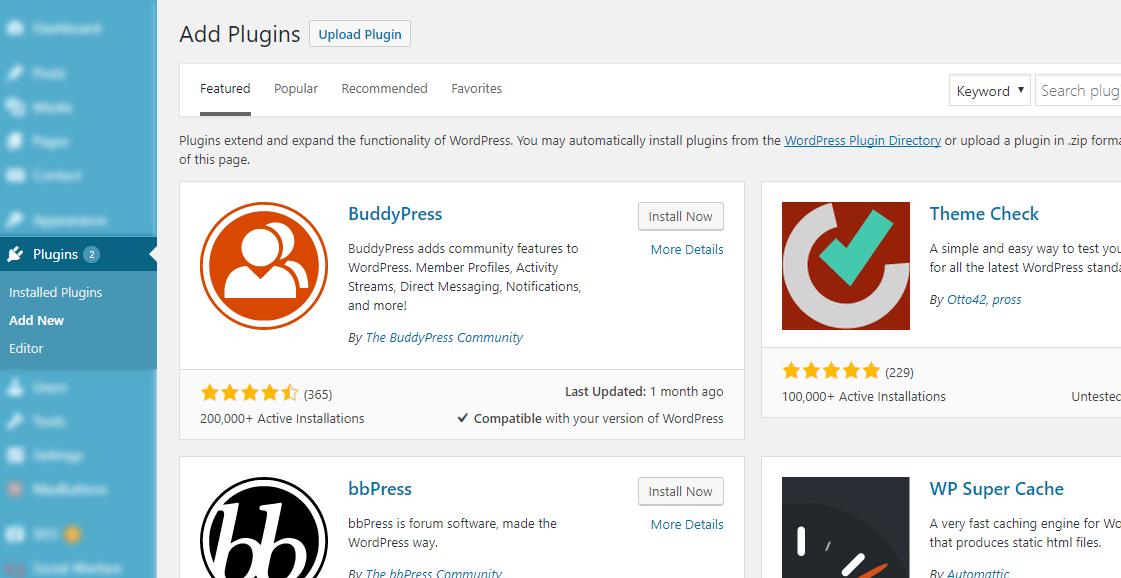 You can think of WordPress plugins as third-party apps for your website. They give your blog additional features. Most plugins are free, but some you have to pay for. You can download new plugins in the “plugin” section of your WordPress Dashboard.
Here are some recommendations:
There are others, of course, but these will get you started.
Step 8. First Blogging Steps
Part 1 – Create An About Page
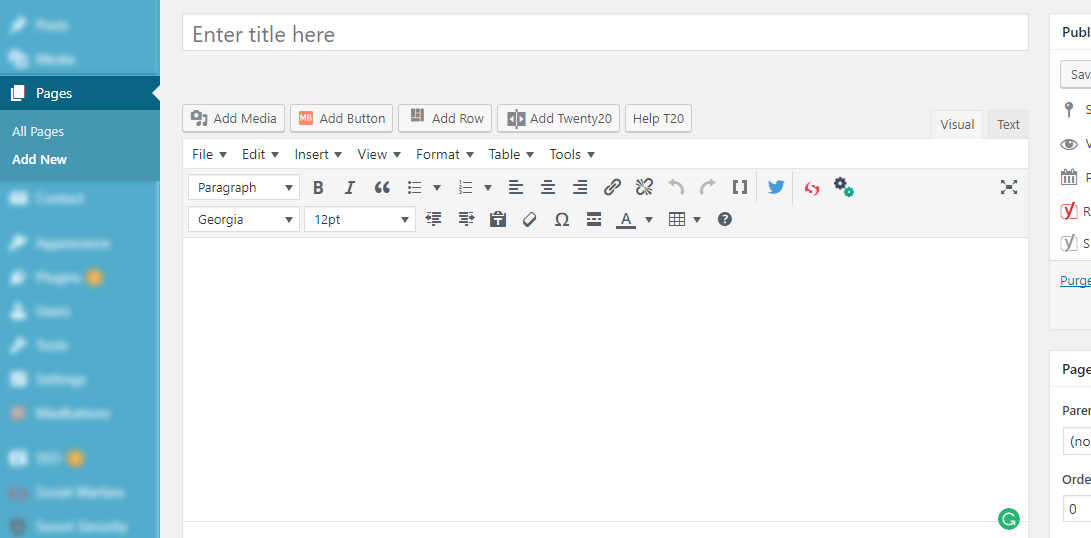 One of the first things you should do on your blog is to create an About page. This is one of the most highly trafficked pages on any travel blog because it tells people who you are, gives your background, and explains why someone should follow you. Keep it fun and personable. Let your readers know who you are!
To create this page, go to your left sidebar and click Pages —> Add New.
Part 2 – Write Your First Post
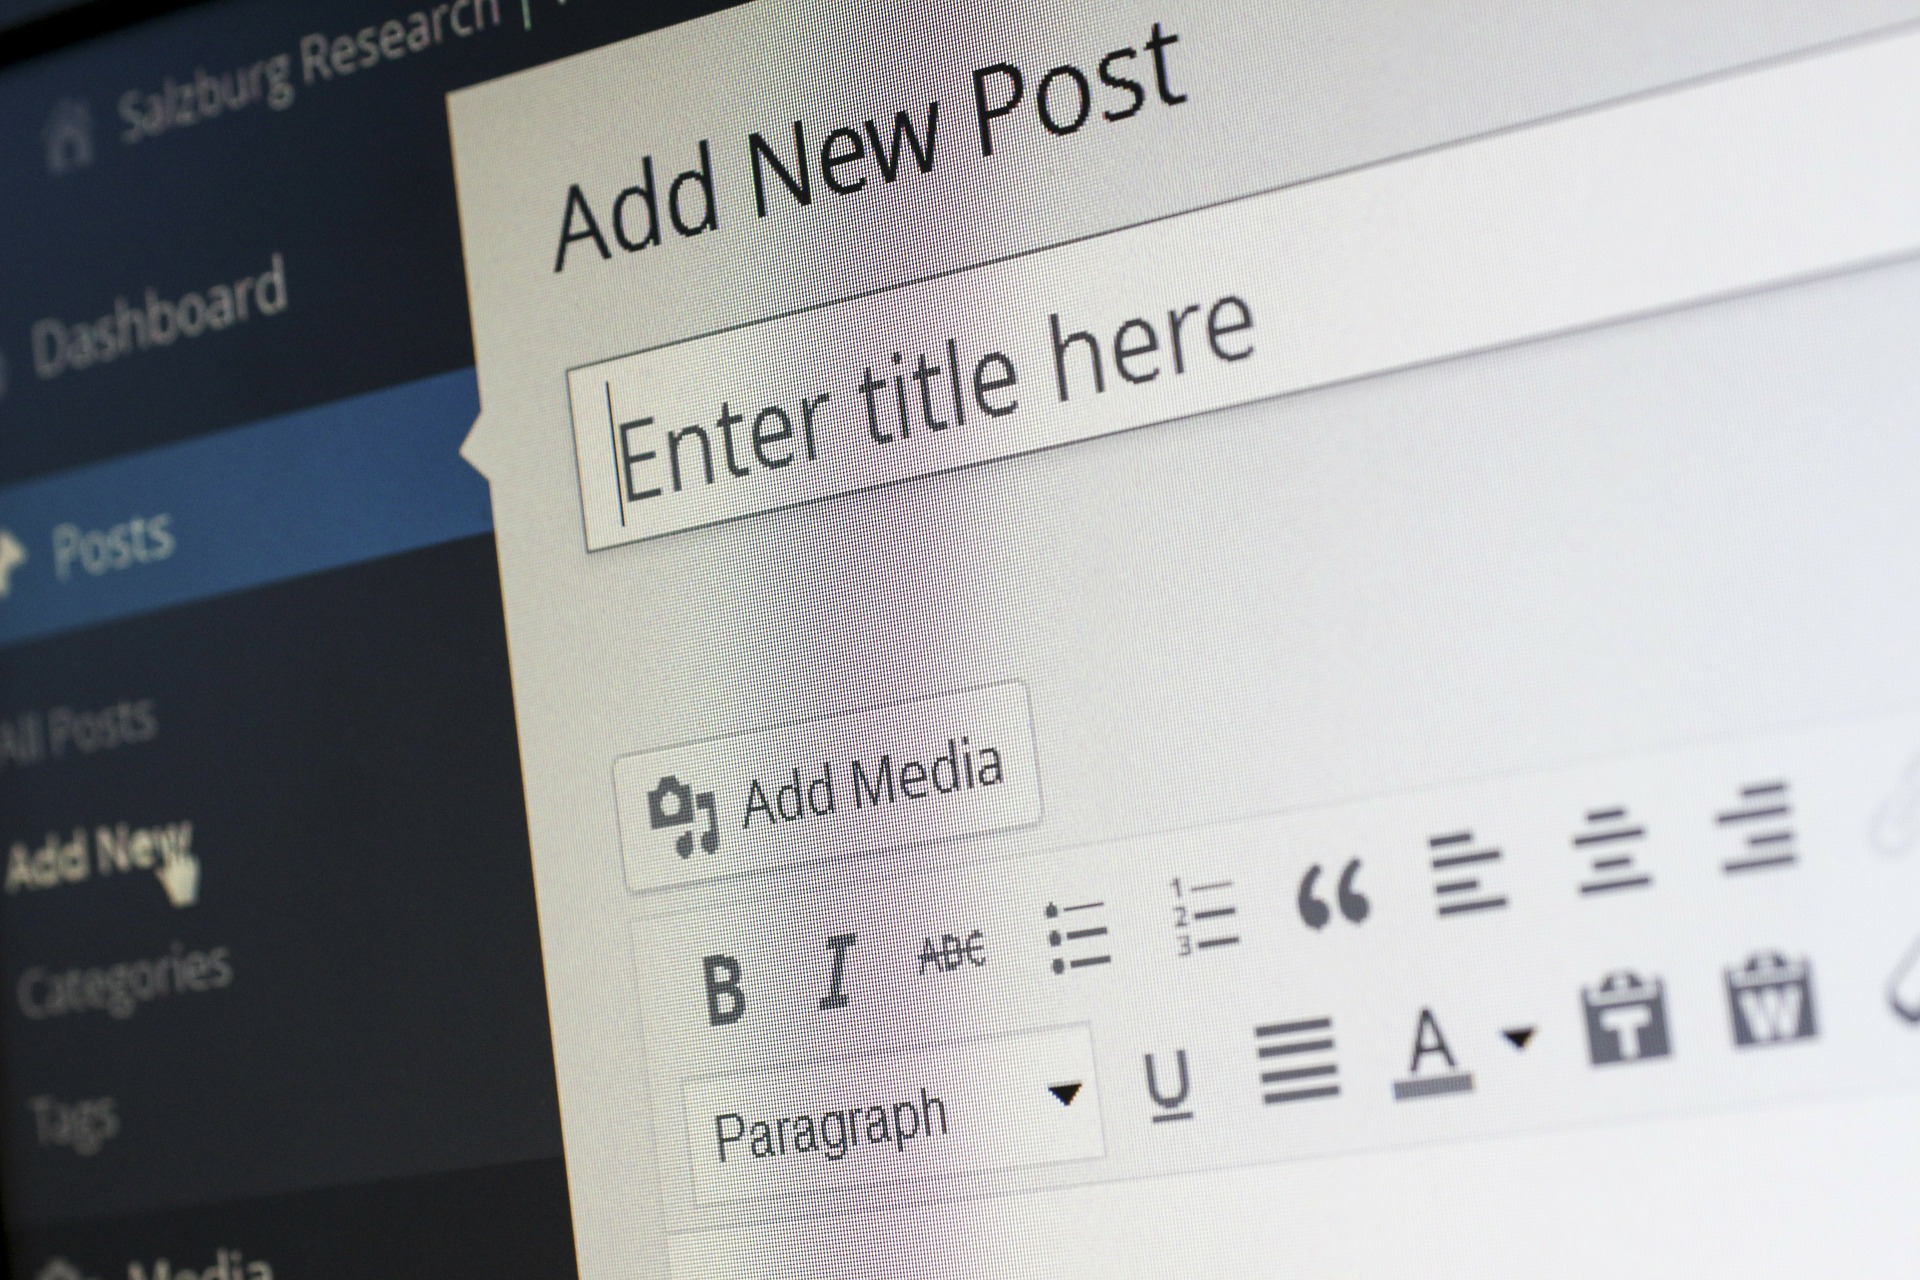 Now it’s time to begin creating content for your travel blog. This can be about anything. Tell people why you started the blog, what it will be about, where you’re going, and where you’ve been. Your introduction is how people will get to know you, and it helps kick your blog off with a bang. When you are ready, start publishing new articles at least 1-2 times weekly. But remember, quality is more important than quantity! Don’t be boring. Be a person, and most importantly, be yourself.
Try writing about different topics to find your voice and see what posts resonate with readers.
Whatever the topic is, writing a post will help you understand how to publish images, headers, and all the other formatting that comes with publishing on WordPress. To create new posts, go again to your left sidebar and click Posts –> Add New.
Part 3 – Embrace Social Media
 Posting regularly to social media is essential to build a successful travel blog. Make sure you create profiles for your blog in the following:
Instagram Account: www.instagram.com
Twitter: twitter.com
Pinterest: www.pinterest.com
Snapchat: www.snapchat.com
Part 4 – Network With Other Bloggers
Find a group of bloggers who started at a similar time to you. Create a Facebook group and use it to bounce ideas off of each other. Share tips on building your audience, finding your niche, and making money.
Remember to read other travel blogs for inspiration and ideas, and leave thoughtful comments on their articles. Link to other people’s blog posts from your site when appropriate. Become an active member of the travel blogging community.
Part 5 – Create a Business Plan
Nobody talks about this, but it’s so important! To succeed, you need to treat your travel blog just like any other business. How are you going to find success? How will you build an audience? Where do you want to be in three months? Where do you want to be featured? Start thinking long-term, write down your goals, and start working towards them from day one.
Part 6 – Get Google Analytics
You’ll want to be able to measure your success, so Google Analytics is a must. This will allow you to track your traffic and learn more about your readers. You can see what kind of posts resonate well and which ones aren’t so much. It’s invaluable, and when it comes time to work with hotels and big clients, they’ll want all this info, so get it going from the outset.
Sign up here. It’s free: www.google.com/analytics
STEP 9. Making Money With Your Blog

Some travel bloggers are known to make over six-figure income every month. Growing such a revenue stream takes a lot of time, but even newbies can start making money after a few months of dedicated work.
Your success could be quicker with the right planning, tools, resources, and learning.
There are plenty of ways to start earning money that won’t negatively affect your growth or annoy anyone who visits your site. Here are some methods successful bloggers have monetized their sites:
So you’ve been wondering how to start a travel blog; well, now you know, so don’t hesitate.
Good luck, and happy travel blogging!
Pin this post to save it for later!